The next steps in building our new shower room upstairs involved putting in place the structure of the bathroom. We installed a new vapor barrier, had a window put in, and built the partition walls. We even did some of these things two or three times because it was so much fun the first time around because we made mistakes.
Vapor barrier
When we uncovered the old drywall from the sloped ceiling/roof, we noticed that while the insulation was ample and in good shape, the old aluminium foil vapor barrier was full of holes. After getting some instruction at the home improvement center, we went about removing the old wooden slats to which the old drywall was attached, and putting in place a new vapor barrier.
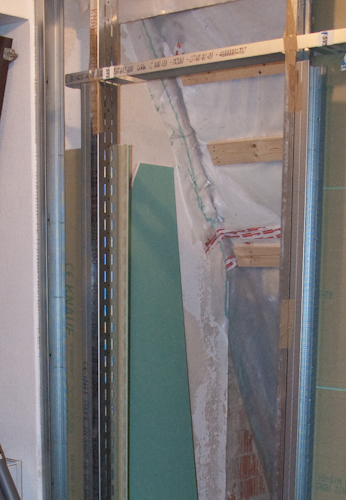
The currently common sort of barrier is essentially a heavy sheet of plastic that is air tight, and thereby keeps separate the atmosphere in the bathroom and other room from the air in the insulating layer. The edges of the plastic are to be taped to the front wall of the bathroom using special tape, and caulked to masonry walls. New wide slats of lumber nailed to the roof beams are meant to keep the vapor barrier in place, be a support for new drywall on the sloped part of the wall, and to later provide an upper surface for the vertical wall that meets the slope.
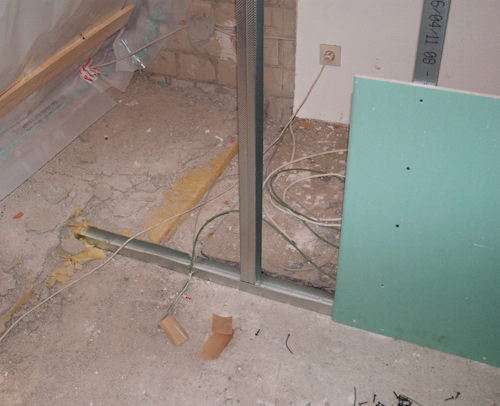
Those damned slats and beams were main source of a lot of the headaches we had with building the walls. We didn’t have a reliable way of measuring the evenness of the roof beams, so we assumed it was ok since the wall we ripped out looked even enough. It turns out, they were very uneven indeed. In addition, the last beam on the left was quite far away from the masonry wall, so we had quite a bit of the left parts of the slats just suspended in mid air. We couldn’t rely on the floor’s evenness either, since the concrete slab was obviously very bumpy.
We wound up redoing the vapor barrier once since we made it too taut in places (it’s supposed to be quite slack). We put tons of holes in the thing by accident, which we could fix with the special tape, but which left a higher percentage of tape than strictly necessary. I caulked a total of three times since the first time I made things too taut, and the second time the border was in the wrong position.
Lesson 1: the vapor barrier should be as slack as possible, and fixed as close to the corner as possible.
New window
We then had a roofer come and install a window. We’re happy enough with the window, but if I were to do it over again, I’d have opted for a taller size.
Lesson 2: Don’t be shy about getting a bigger window.
Drywall construction
In the US, the standard practice is to build a frame out of lumber studs and screw drywall to the frame. Joints between sheets of drywall are closed with joining compound or drywall mud, and the joints are taped over. While some people here in Germany do build walls using this method, it seems that it is much more common to use a system from a manufacturer such as Rigips or Knauf that involves metal studs. We picked Knauf because one of the better home improvement centers in the area had that and not the other. So, once again, everything I learned from “This Old House” goes out the window…
These systems are meant to make construction easier, kind of like a kit with step by step instructions. Metal tracks are screwed in place top and bottom, metal studs go inside. In addition, the metal studs are meant to be more robust and not likely to shrink or warp. Special beams of heavier metal provide stability for doors. Nice in theory. In practice, I think their instructions suck. The manufacturers do provide very cursory instructions for building a standard wall, including a dvd featuring Germany’s worst actors building a wall so they can play fussball in peace. However, a lot of the info is scattered about their website. There’s no guidance that we could find on how to handle sloped walls, inside corners, corners not at 90°, how to choose a wall thickness, or anything about the minimum distance of a door to the end of a wall. There is a range of possibilities for studs, boards, screws, joining compound (henceforth “goop”), but nothing to indicate what should be chosen when and why. The studs themselves handle well enough, I suppose, though it is impossible to cut them without them bending near the cut. All of this led to some of our next problems.
Secretly uneven beams
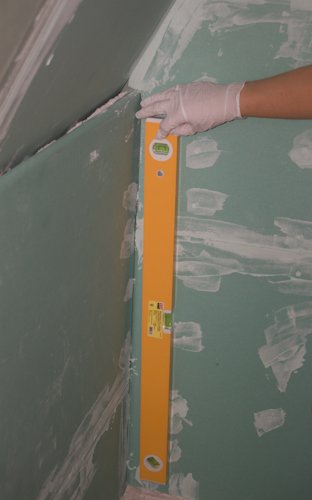
Our biggest goof was in building the back wall. The upper track needed to be screwed in a horizontal position to the 60° sloping ceiling. We kind of did this with the help of wood of triangular cross-section – with 45° angles. We managed to make the upper track level, but plumb it was not. The right top leaned forward 1.5 to 2 cm. Doh. Of course, we only noticed this well after the point of no return. Once we put the drywall up on the slope itself, we could see that it was more like the surface of the sea than a plane.
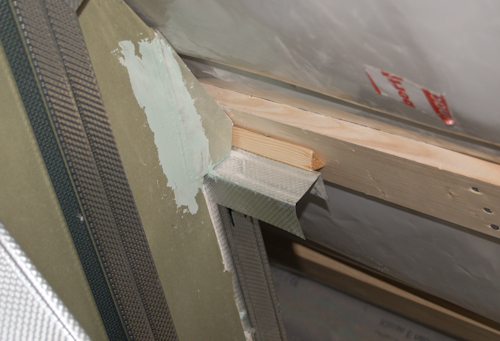
This is how we attached the top track to the slope. I guess it should have been obvious that this would lead to problems. Hindsight....
Fortunately, our wonderful tile guy saved our butts with this mess, and the end result looks and functions just fine. But none of our corners are 90° (or 60° or 120° as they are supposed to be), and if you add up the four corner angles of the nominally rectangular floor, they don’t add up to 360°.
Lesson 3: when building a wall that meets a slope, try to build the vertical wall up first, then worry about the slope. Check and double check the level AND the plumb. And maybe invest in a laser level.
Door placement and width
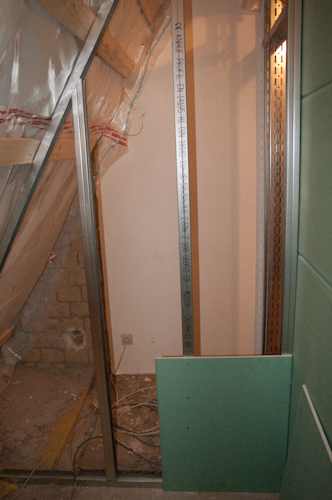
I had originally specified the doors to the closet and the bathroom to both have a standard 73.5 cm width. Because of my earlier error in calculating the planned breadth of the bathroom and our subsequent decision to widen the space by 10 cm, and because the door opening apparently has to be a minimum of 20 cm away from the masonry wall, we had to shrink the closet door to the next smallest standard size. There went symmetry.
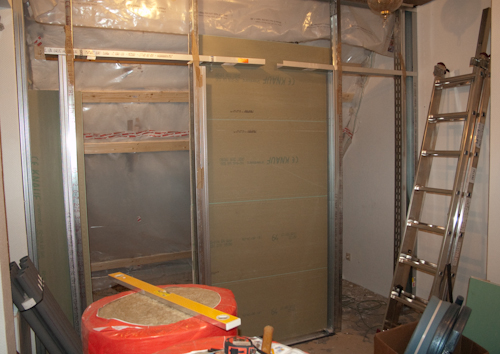
The left and right rectangles are the door openings. You can see on the right that the opening can't be any closer to that wall.
We looked up on the web the size of the wall opening needed for the door size we wanted. As it turns out, it was too small, and our door guy later had to work a bit to get the doors in. Whoops. I guess not everything you read on the internet is right. Who knew?
Lesson 4: Make the door opening wider, and be mindful of that minimum distance when planning.
Bad planning and an absurdly thick wall
The last of our misadventures involved the wall separating the room from the bathroom. I specified the thickness at 12 cm, a number I pulled straight out of my ass. I couldn’t get any guidance on how to choose this thickness from any source. This meant we went with 10cm wide stud tracks. In retrospect, we should have used studs one step thinner.
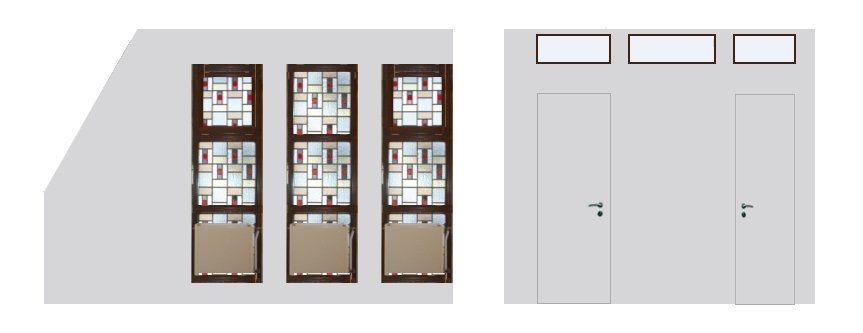
On the left is the view of the left wall. The right is the directly abutting wall with doors. We wanted hidden doors since in a small room there would be too much visual noise, especially with those windows right there in view.
We wanted the wall to be flush with the inside of the window opening. So, we screwed in place the stud tracks with so that one layer of drywall would be even with that surface. This would have been fine had we not dropped the ball badly on our door planning.
For aesthetic reasons, I wanted the doors to be hidden doors, where the door frame is hidden and the door and the wall are on a level. We didn’t look into prices and delivery times soon enough. Ready made hidden doors turned out to have a long delivery time and worse, were absurdly expensive. Our local door guy had the idea of using a standard door, and hiding the door frame with drywall. Even with the extra drywall, the cost of this was less than a third of the cost of the ready doors. But this threw the position of the door out, since now there would be the equivalent of 3 layers of drywall on the studs. I’m hoping that I can make the slight slope down to the window opening not too noticeable.
Lesson 5: Make the walls thinner unless you have a good concrete reason (like pipes) to go thicker.
Lesson 6: Choose your door supplier a little earlier than we did!
© 2011 – 2012, Converting a Church. All rights reserved.
