Over the last couple of months, we’ve been busy with building the new bathroom upstairs in the former Jugendraum, and renovating the rest of the room itself. Our initial plans can be found in this older post. We’ve had lots of new experiences, partially since we, the neophytes, decided to do some of the work ourselves. It’s been quite tiring and a little boring, and didn’t really inspire me to write posts here. But I’ve gotten requests, so here goes.
We planned that we would take on the tasks of preparing the room for the plumbers, tilers, and parquet layers, and building the drywall walls. We wanted the experience, and felt it good to have some of your own sweat in your home. These tasks are “easy”. We couldn’t screw them up too badly (right? right?). I didn’t plan that we would save money, and we probably didn’t considering that we needed to do some of these tasks 2 or 3 times because we fouled things up one way or another.
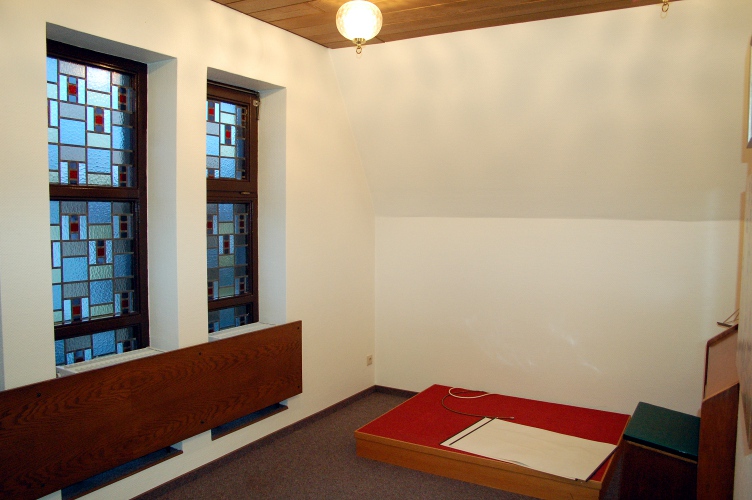
Here’s a view again of the original state of the room, and in particular, the corner which will be the new bathroom.
In which we hire a stripper…
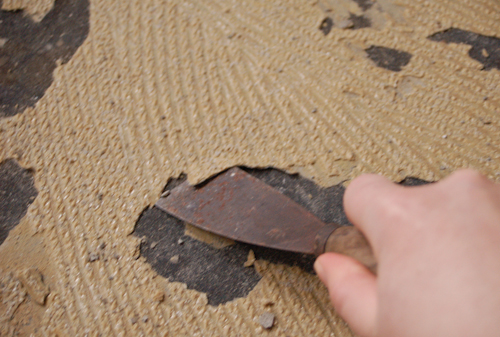
The first task of destruction was to remove the carpet. This came up after a few evenings of robust pulling. The asphalt subfloor we unearthed was covered with flaking yellow carpet adhesive. Fantastic. But not unexpected. If you’ve done any renovation of this sort before, you’ll already know that yellow carpet adhesive is the spawn of the devil. Since the stuff was flaking off in places, it couldn’t be left in place with the new wood floor on top. It had to be removed as much as possible.
The flakiest bits came up with a putty knife, and slightly less flaky bits yielded to a hammered chisel. The rest? Horrible. The wisdom of the internet suggested that heat might soften the stuff, so we tried that. The tip of boiling water just gave us a wet floor. The glue didn’t budge. Heat gun application produced some really interesting fumes, and softened the glue just enough to make removal even harder, like scraping out a pot of freshly made hard candy that is just about to harden completely. The spatula would embed itself in the goo if it cooled back down even slightly. Miserable. A little hand tool that consisted of a blade sent back and forth with a motor sort of planed some of the adhesive off a tiny bit at a time, but it was like digging to China with a teaspoon. We decided to see what the home improvement store had to offer.
They had a stripper for hire. 30 Euros for 4 hours. Having tried everything else, we took this cheap stripper home for a bit to see how she would perform. The machine is the unholy offspring of a three-way involving a jackhammer, a vertical row weight machine, and a spatula. You lean against a pad at the top, hold on to two handles at the sides, and using your body angle a spatula/blade thing against the adhesive while the machine vibrates. The vibrations are probably the worst part (though the noise and dust suck too). After a few minutes, your hands and arms get paresthesia that takes an hour to go away. Neither of us could stand more than 2 hours of this, so after 4 hours, we took the stripper back. We got a good bit of the gunk off with it, though not all. Our floor guy said it was good enough, fortunately.
Wall takedown
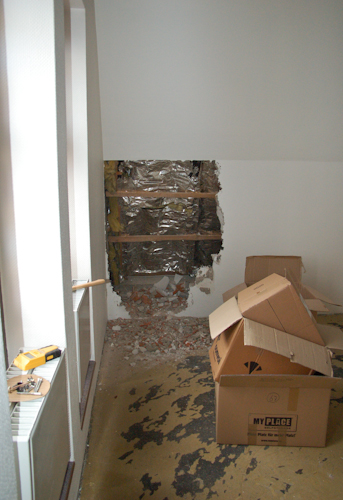
The next task was dismantling the back wall. We needed to move the wall a few centimeters to give more space in the bathroom, and to be able to install a toilet tank. There was no discernible reason for the wall to be where it was. This was a bit of muscle work with the back of an axe.
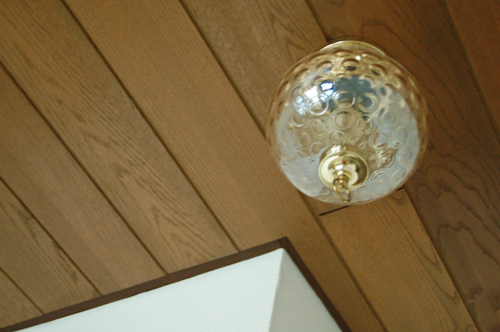
Since these were likely not appropriate for a wet room, we took down part of the drywall on the slope, and carefully removed some of the ceiling panels. After a lot of consideration, we decided to keep the wood paneling on the ceiling. Yes it’s a bit outdated and groovy (figuratively and literally), but it fits the style and era of the building. The gawdawful lamps will go, though.
Cutting out subfloor
The last of the destruction involved cutting out part of the asphalt subfloor. The existing subfloor didn’t extend beyond the front of the wall that we needed to move back. This meant that the tile guys would either have to pour a bit of new subfloor and risk a natural place for cracks in the tiles, or we’d remove the lot and they could pour a new patch of subfloor under the whole bathroom. So, we got an angle grinder and a hazmat suit, cut out an appropriately large rectangle of the asphalt, broke it up with the hammering drill, and lifted it off the concrete.
In part 2, we build the drywall. And decide that 90° angles are way overrated. Or something.
© 2011 – 2012, Converting a Church. All rights reserved.


