I’ve not been particularly consistent with posting thanks to all the excitement of moving in, getting our stuff, taking care of the myriad formalities (about which I’ll write later – there’s no “how to convert a former sacred building in Germany” on the web right now). We’ve been particularly busy with planning the upstairs wet room.
We’re both very impatient to finally be able to take a warm shower with water that comes out of a shower head! So far, bathing in this house has meant standing in an unheated cellar room with a drain in the floor, with a 40 liter plastic Ikea document storage box holding about 10 liters of warm water (the amount the tiny old electric boiler can produce at a go), and pouring said water over one’s self with a plastic Ikea measuring cup. (Some Ikea hack, eh?) Obviously, this shower situation is getting old fast.
We’ve had six plumbing-and-heating guys through the place in order to get offers. The offers themselves have been slooooowly trickling in (only three so far). Meanwhile, I’ve been busying myself with planning the details of this little bathroom. Since it’s being shoehorned into such a tight space, I have quite a challenge to make sure everything fits in and looks ok. We’ve had long debates on the merits of various solutions.
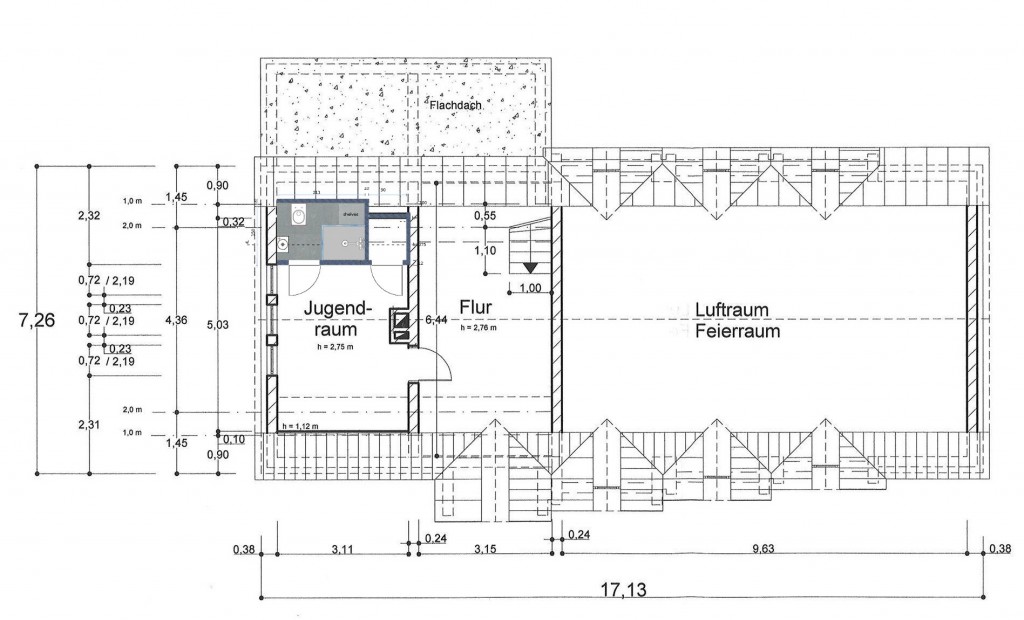
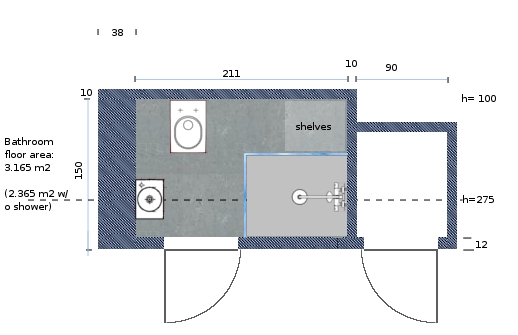
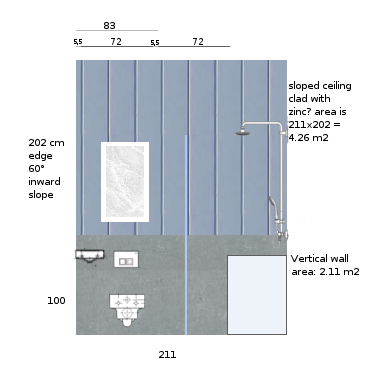
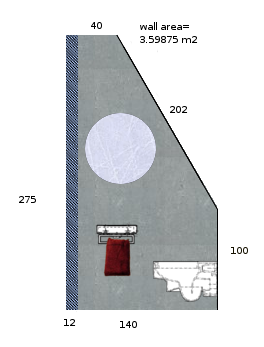
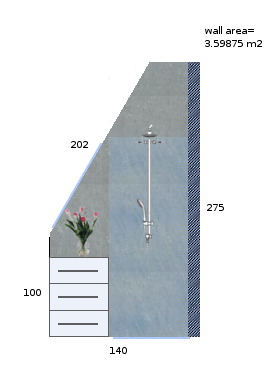
The space itself is 211 cm x 150 cm, with a somewhat annoying 60° sloped wall. This means many off-the-shelf things just don’t fit. It also didn’t help that I mismeasured the space by 25cm, and so had to do part of this planning twice (Bad-planung indeed). I did at least do all the trigonometry right the first time around, further showing that it’s always reality that gives me problems.
I mentioned in a previous post the fittings we plan on adding. The drawings I’m putting in are to scale, and include diagrams of those fittings. The bathroom is a very small space indeed. We’ve taken some inspiration from the lilliputian bathrooms we’ve encountered at various hotels in Brussels over the years. The Belgian bath designers can fit a whole bathroom into the tiniest spaces. Ours will be about 3 m2, which is far from the smallest of the Brussels bathrooms. A Belgian would probably think we have plenty of room for a tub too.
The Great Solar Tube vs Roof Window Debate
Most of the people that stumble upon this blog via google do so via the search terms “solar tube”. Looks like I’ll continue to frustrate those people….
Obviously, our new little bathroom needs light and ventilation. What is not so obvious is how to best provide this breath of the outside. We identified three possibilities:
- Cheap solution: drill a hole through wall or roof for ventilation. Use artificial light.
- High-tech solution: install a solar tube with integrated ventilation.
- Simple solution: put in a roof window/skylight.
Since this future bathroom is set in the corner of the building, and so has two outside walls, getting outside light shouldn’t be that much more effort than putting in a ventilation fan. Thus, we ruled out option number 1 straight away.
I was really pushing for option 2. A solar tube doesn’t have to be cleaned, the external dome on the roof is smaller and less obtrusive than a window, there’s less heat loss in the winter/heat gain in the summer, and the thing is marginally easier and cheaper to install than a window. There are two relatively easily available brands of solar tube: the Velux Tageslicht-spot and the even more high-tech Solatube. The installation of the tube itself was not the problem – we could find a good place for a 10 to 14 centimeter diameter tube, and the price of this compared favorably with the price of a window. The rub was in the ventilation. The Velux Spot has a ventilation accessory, but it can’t be used on our particular kind of roof. Solatube also has a ventilation accessory, but the price of this is almost as much as the tube itself. A window is not much (if at all) more expensive compared to the tube plus ventilation accessory. I am still strongly considering a solar tube for the upstairs hallway where there are no ventilation complications.

From Roto's promotional material. A lovely diagram showing how competitors' windows smack you in the face.
So, the window won based on total price. Another advantage of a window in the placement that we picked is the extra head-space over the john that it provides. The width of the window is limited by the space between the beams of the roof, but it seems that one of the standard sizes will do. We haven’t picked a brand yet. The apparently obvious choice around these parts, Velux, doesn’t seem to offer something that works in our case. Their window that has a hinge at the top is only suitable on roofs of slope up to 55°, ruling out our 60° slope. Their other design, with axis of rotation a third of the way down, swings too much into the room, and would hit the shower wall or your nose. Another brand, Roto, has a design that works better with our sort of slope and doesn’t smack you in the face when you open it, though the brand is a bit pricier.
The Great Pocket Door versus Normal Door Debate
Our next dilemma was the door. At first, I thought that a pocket door would be just the thing for this spot. One wouldn’t lose any space from a moving door, and there wouldn’t be any trouble with installation since we’re having to build the wall it would live in anyway. This is a pretty common solution for a bathroom door in the US, the UK, and Italy. But apparently not in Germany.
I guess the first clue that such doors are not common in Germany was the fact that I had a hard time finding the right words for “pocket door”. And once I found it, I see that it’s long and awkward “in der Wand laufende Schiebetür”. If a society doesn’t have a snappy word for something, then that usually means they don’t use that thing much. Most of the door sellers and contractors we talked to hadn’t ever installed a pocket door, had no idea how thick the wall would have to be, and couldn’t tell us much about where we could get the hardware, or how much it would cost.
We eventually did find that Knauf supplies pocket door hardware, though this is very hidden on their German website. Because we decided we wanted to add a door to the closet neighboring the new bathroom, and also thanks to my overestimation of the space by that 25cm, we decided against the pocket door in the end.
The view from the other side
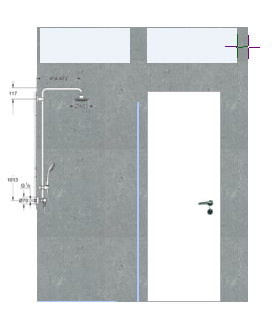
Another object of long debates was the visual appearance of the door, as seen from the office. How tall should the door be, what material, sliding or not, what pattern or design? How to balance the bathroom door with the closet door, and with the windows on the left hand side?
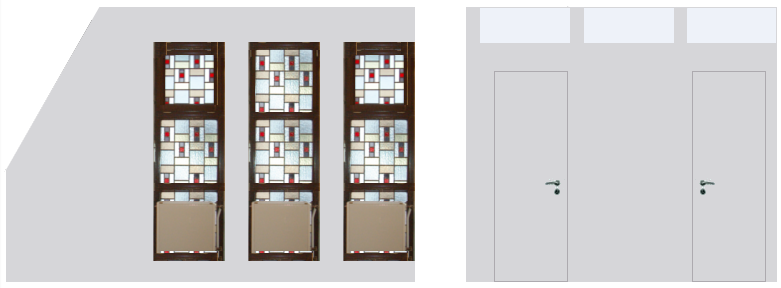
On the left, a view of the wall with windows and radiators. On the right, the wall containing doors to the bathroom and closet.
As you can see in the diagram above, the windows have a very strong visual presence in the room. They’re also very very tall. We found that none of the various standard door heights were anywhere near as tall as the windows, and none of them lined up at all with any of the other lines demarcated by the panes or glass design. We could go custom, which seemed overly complicated and expensive, or find another solution. We eventually decided that the best thing would be to pick a flush door designs for both doors that would not even try to compete with the windows.
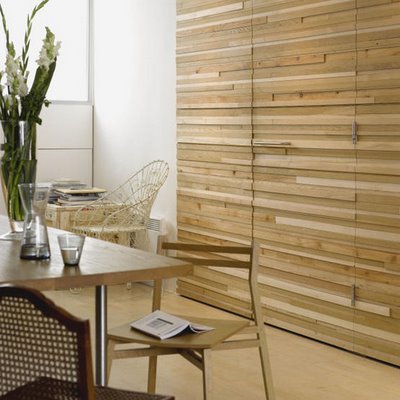
via Style Niche. A flush door further concealed by choice of wall treatment. Our wall treatment will undoubtedly be more simple that what is pictured here, but will hopefully still help conceal the door.
Finally, there was the question of door material. The obvious choice around here for bathroom doors is frosted glass. However, once we decided on the window and placement, there was a good chance that even an extremely frosted glass door would show a little too much about the crouching style of anyone using the bathroom. Ahem. We did, however like the idea of drawing a little light from the bathroom window into the office. The solution is transom windows. These would give light to the office from the bathroom, and light to the closet from the office.
The number and arrangement of the transoms is still not finalized, and my pictures above only give one possible solution. We’d like to try to balance the blank space above the windows on the left with a transom of equal thickness all the way across the wall. We’ll also investigate the cost of also making the transoms flush, as in the photo below.
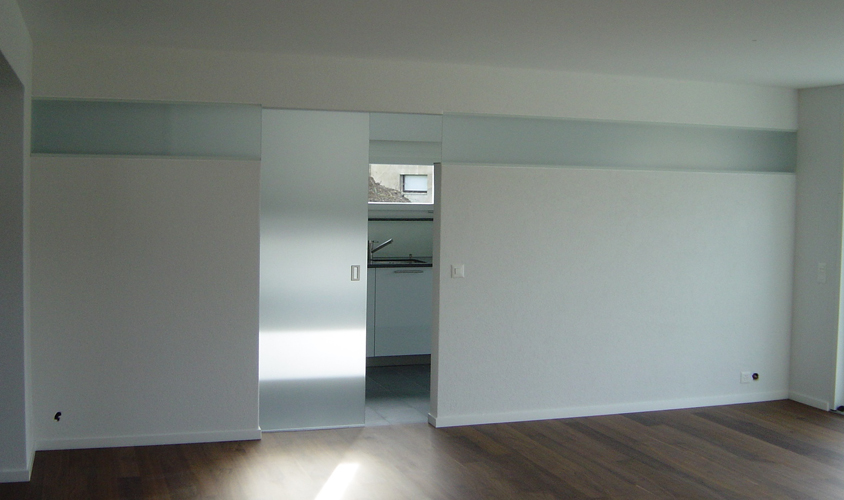
via AlboPlan.ch. A flush "Lichtband" transom window, going through the top of a glazed sliding door. Is it still a "transom" if it intersects the door?
Now we await the last offers, and some planning permission. We’ve already begun ripping out the carpet, and tearing down the back wall. More about the fun of destruction later.
© 2011 – 2012, Converting a Church. All rights reserved.

1 ping
Jugendraum conversion, part 1: Destruction » Converting a Church says:
August 4, 2011 at 14:35 (UTC 1 )
[...] former Jugendraum, and renovating the rest of the room itself. Our initial plans can be found in this older post. We’ve had lots of new experiences, partially since we, the neophytes, decided to do some of [...]